
Volumetric Analysis: What It Is, How It Works, and Why It Still Matters


Volumetric Analysis
If you have ever seen a chemist carefully drip liquid from a burette into a flask, watching for a sudden color change, you have watched volumetric analysis in action. It is one of the oldest quantitative techniques in chemistry, and despite the rise of expensive automated instruments, it remains one of the most reliable, affordable, and widely taught methods for finding out exactly how much of a substance is present in a sample.
This guide explains volumetric analysis from the ground up. You will learn what it actually is, how it works step by step, the different types used across science and industry, the calculations behind it, where it goes wrong, and why laboratories around the world still depend on it every single day.
What Is Volumetric Analysis?
The Basic Definition
Volumetric analysis, also called titrimetric analysis, is a quantitative chemical analysis method used to determine the concentration of an unknown substance in a solution by measuring the volume of a reagent of known concentration needed to completely react with it.
In plain language: you already know exactly how strong one solution is, and you use it to figure out how strong a different, unknown solution is, by carefully measuring how much of the known solution it takes to fully react with the unknown one.
The core tool of volumetric analysis is the titration, a controlled process where a solution of known concentration, called the titrant, is added drop by drop to a solution of unknown concentration, called the analyte, until the reaction between them is judged to be complete.
Why It Is Called "Volumetric"
The name comes directly from the method itself. Instead of weighing a substance (which would be gravimetric analysis), volumetric analysis relies on precisely measuring the volume of liquid used in a reaction. Because volume can be measured with extremely high precision using calibrated glassware, this approach allows chemists to calculate concentration with a level of accuracy that rivals far more expensive laboratory instruments.
How Volumetric Analysis Works, Step by Step
Understanding the mechanics of a titration makes the entire concept click into place. Here is what actually happens in a standard volumetric analysis procedure.
Step 1: Prepare a Standard Solution
A standard solution is a solution whose exact concentration is already known. It is usually made by dissolving a precisely weighed mass of a pure, stable chemical (called a primary standard) in a specific volume of water using a volumetric flask, which is calibrated to hold an exact volume.
Step 2: Measure a Known Volume of the Unknown Solution
A precise volume of the analyte, the solution being tested, is measured using a pipette and transferred into a conical (Erlenmeyer) flask. Pipettes are used specifically because they are calibrated to deliver an exact, repeatable volume, which is essential for accurate results.
Step 3: Add an Indicator
An indicator is a substance that changes color at, or very close to, the point where the reaction is complete. The right indicator depends entirely on the type of reaction being carried out, which is discussed in detail in the sections below.
Step 4: Titrate
The standard solution is loaded into a burette, a long, graduated glass tube with a tap at the bottom that allows liquid to be released in a controlled, drop-by-drop manner. The titrant is slowly added to the flask while it is gently swirled, allowing the reaction to proceed evenly throughout the solution.
Step 5: Identify the Endpoint
The endpoint is the moment the indicator changes color, signaling that the reaction is essentially complete. This is different from the equivalence point, which is the exact theoretical moment when the amount of titrant added has completely reacted with the amount of analyte present. A well-chosen indicator makes the visible endpoint occur as close as possible to the true equivalence point, minimizing error.
Step 6: Record and Calculate
The volume of titrant used is read from the burette and recorded. Using the known concentration and volume of the titrant, along with the balanced chemical equation, the concentration of the unknown solution can be calculated.
The Key Calculation Behind Every Titration
At the heart of volumetric analysis is a single relationship: the number of moles of a substance equals its concentration multiplied by its volume.
moles = concentration (mol/dm³) × volume (dm³)
To find the concentration of the unknown solution, chemists use this general process:
- Calculate the moles of titrant used, using its known concentration and the volume recorded from the burette.
- Use the mole ratio from the balanced chemical equation to determine how many moles of the analyte reacted.
- Divide the moles of analyte by the volume of analyte used to find its concentration.
Worked Example
Suppose 25.0 cm³ of hydrochloric acid (HCl) of unknown concentration is titrated with 0.100 mol/dm³ sodium hydroxide (NaOH), and it takes 22.5 cm³ of NaOH to reach the endpoint.
The balanced equation is:
HCl + NaOH → NaCl + H₂O
This shows a 1:1 mole ratio between HCl and NaOH.
Step 1: Moles of NaOH used = 0.100 mol/dm³ × (22.5 / 1000) dm³ = 0.00225 mol
Step 2: Since the mole ratio is 1:1, moles of HCl = 0.00225 mol
Step 3: Concentration of HCl = moles ÷ volume = 0.00225 mol ÷ (25.0 / 1000) dm³ = 0.090 mol/dm³
This simple three-step process is the backbone of essentially every volumetric calculation, regardless of how complex the reaction chemistry becomes.
Types of Volumetric Analysis
Not all titrations work the same way, because not all reactions behave the same way. Understanding the different categories helps explain why chemists choose specific reagents and indicators for specific problems.
Acid-Base Titrations
This is the most commonly taught form of volumetric analysis, used to determine the concentration of an acid or a base by reacting it with a solution of known concentration of the opposite type.
Common indicators include phenolphthalein, which turns from colorless to pink around pH 8.2 to 10, and methyl orange, which turns from red to yellow around pH 3.1 to 4.4. The choice of indicator depends on the pH at the equivalence point, which itself depends on whether the acid and base involved are strong or weak.
Why this matters in real life: Acid-base titrations are used to check the acidity of food products, determine the purity of pharmaceutical ingredients, and monitor water treatment processes where pH control is critical for safety.
Redox Titrations
Redox titrations rely on oxidation-reduction reactions, where electrons are transferred between the titrant and the analyte, rather than protons as in acid-base reactions.
A widely used example is titrating iron(II) ions against potassium permanganate (KMnO₄). Potassium permanganate is deep purple, and because it reacts with iron(II) to form a nearly colorless product, the endpoint is visible as the very first permanent trace of pink or purple color, meaning it acts as its own indicator without needing a separate one added.
Why this matters in real life: Redox titrations are used to measure the vitamin C content in fruit juice, determine dissolved oxygen levels in water quality testing, and analyze metal ion concentrations in industrial wastewater.
Precipitation Titrations
In a precipitation titration, the titrant and analyte react to form an insoluble solid, called a precipitate. A classic example is titrating a chloride solution with silver nitrate (AgNO₃), where silver ions combine with chloride ions to form solid silver chloride.
Specialized indicators, such as potassium chromate in the Mohr method, are used because the color change depends on a slight excess of silver ions reacting with the indicator only after all the chloride has already been precipitated.
Why this matters in real life: Precipitation titrations are used to test chloride levels in drinking water and to analyze salt content in food processing.
Complexometric Titrations
Complexometric titrations use a reagent, most commonly EDTA (ethylenediaminetetraacetic acid), which forms a stable, soluble complex with metal ions. This method is especially valuable because EDTA can bind to a wide range of metal ions in a predictable one-to-one ratio.
Why this matters in real life: Complexometric titrations are the standard method for measuring water hardness, meaning the concentration of calcium and magnesium ions in water, which affects everything from soap efficiency to industrial boiler maintenance.
Equipment Every Volumetric Analysis Depends On
Precision in volumetric analysis comes entirely from precision in equipment, so understanding the tools is essential to understanding the method's reliability.
- Burette: A long graduated tube with a stopcock (tap), used to deliver a precisely measured, variable volume of titrant. Burettes are typically read to the nearest 0.05 cm³, allowing very fine control over how much liquid is added.
- Pipette: Used to transfer a fixed, exact volume of liquid, most commonly using a volumetric (bulb) pipette calibrated for a single specific volume, such as 25.00 cm³.
- Volumetric flask: A flask calibrated to hold one exact volume, marked by a single graduation line, used for accurately preparing standard solutions.
- Conical flask: The reaction vessel where the titration actually takes place. Its narrow neck and sloped sides make it easy to swirl the contents without splashing.
- White tile: Placed underneath the conical flask during titration so that subtle color changes in the solution are easier to see against a plain white background.
Common Mistakes That Ruin Volumetric Analysis Results
- Air bubbles in the burette tip. If an air bubble is trapped in the burette's tap or tip before titration begins and it escapes during the titration, it creates a false reading, making it look like more titrant was used than actually reacted.
- Reading the meniscus incorrectly. Liquids in glass tubes form a curved surface called a meniscus. Readings should always be taken at eye level, at the bottom of the curve for most liquids, to avoid parallax error, which happens when the eye is not level with the liquid surface.
- Overshooting the endpoint. Adding titrant too quickly near the endpoint can cause you to add more than needed before the color change is even visible, leading to an inflated volume reading and an inaccurate concentration calculation.
- Not rinsing equipment properly. A burette or pipette contaminated with water or a previous solution dilutes the reagent inside it, throwing off the entire calculation. Best practice is to rinse each piece of glassware with the solution it will actually contain before starting.
- Choosing the wrong indicator. Using an indicator that changes color far from the true equivalence point, such as using phenolphthalein for a weak base and strong acid titration, introduces a significant, avoidable error into the final result.
Case Study: Determining the Concentration of Vinegar Using Volumetric Analysis
A practical, well-documented example of volumetric analysis in action is determining the concentration of acetic acid in ordinary household vinegar, a common experiment used in both educational and quality control settings.
A sample of vinegar is diluted to a known volume, and a fixed volume of the diluted vinegar is titrated against a standard sodium hydroxide solution, using phenolphthalein as the indicator because acetic acid is a weak acid and sodium hydroxide is a strong base, meaning the equivalence point occurs at a pH comfortably within phenolphthalein's color-change range.
Using the same three-step method described earlier (moles of NaOH, mole ratio, then concentration), the calculated concentration of acetic acid in the diluted sample is scaled back up according to the original dilution factor. This calculation typically produces a result close to the concentration printed on commercial vinegar labels, usually around 4 to 7 percent acetic acid by volume, demonstrating how accurately a simple titration performed with standard laboratory equipment can match real-world, commercially verified values. This case also illustrates why volumetric analysis remains trusted in quality control laboratories: it can verify manufacturer claims using equipment that costs a small fraction of instrumental alternatives.
Volumetric Analysis vs Gravimetric Analysis: What Is the Difference?
Volumetric analysis and gravimetric analysis are both classical quantitative chemistry techniques, but they measure different things to reach a result.
- Volumetric analysis determines concentration by measuring the volume of a reacting solution.
- Gravimetric analysis determines composition by measuring the mass of a precipitate or residue formed from a reaction, typically after filtering, drying, and weighing it.
Volumetric analysis is generally faster and requires simpler equipment, making it well suited for routine testing and educational laboratories. Gravimetric analysis tends to be more precise for certain applications but is significantly more time-consuming, since it often requires careful drying and repeated weighing to reach a stable, accurate mass. Many analytical laboratories use both methods depending on the required speed, precision, and nature of the sample being tested.
Why Volumetric Analysis Still Matters in a World of Advanced Instruments
Modern laboratories have access to instruments like spectrophotometers, chromatographs, and automated titrators, so it is reasonable to ask why volumetric analysis, a technique centuries old, is still taught and used.
The answer comes down to accessibility, reliability, and education. Volumetric analysis requires no electricity, no software calibration, and no expensive consumables, making it invaluable in field testing, developing regions, and educational settings where budgets are limited. It also builds a foundational understanding of stoichiometry, chemical equilibrium, and quantitative reasoning that underpins every more advanced analytical technique a student will later encounter. Even in fully automated modern laboratories, automated titrators still operate on exactly the same chemical principles described in this guide, simply replacing a human hand on the burette with a motorized syringe pump and an electronic sensor for the endpoint.
Frequently Asked Questions
What is the difference between the equivalence point and the endpoint in a titration?
The equivalence point is the exact theoretical moment when the moles of titrant added exactly match the moles of analyte present, based on the stoichiometry of the reaction. The endpoint is the moment the indicator visibly changes color, signaling to the person performing the titration that the reaction is essentially complete. A well-chosen indicator makes these two points occur at nearly the same volume of titrant added.
Why is a burette used instead of just pouring the titrant in?
A burette allows extremely controlled, drop-by-drop addition of the titrant, which is essential near the endpoint where even a single extra drop can shift the reading and introduce error. Pouring freely would make it impossible to stop at the precise moment the reaction is complete.
Can volumetric analysis be used for solids or gases?
Volumetric analysis is fundamentally a solution-based technique, so solids must first be dissolved in an appropriate solvent and gases must typically be absorbed into a solution before the sample can be titrated. Once converted into solution form, the same titration principles apply.
What makes a substance suitable as a primary standard?
A good primary standard must be available in a very pure form, be stable and unreactive with air or moisture during storage, have a high molar mass to minimize weighing errors, and dissolve completely and predictably in water. Sodium carbonate and potassium hydrogen phthalate are commonly used examples in acid-base titrations.
Why do some titrations not need an added indicator?
Some reactions involve a reactant that is itself strongly colored and changes color dramatically as it reacts, acting as its own built-in indicator. Potassium permanganate is the most common example, since its distinctive purple color disappears until the very last drop, at which point a faint persistent pink signals the endpoint.
Is volumetric analysis considered accurate compared to modern instruments?
When performed carefully with properly calibrated glassware, volumetric analysis can achieve accuracy within a fraction of a percent, which is more than sufficient for most educational, quality control, and routine industrial applications. Highly specialized research applications may still require instrumental methods for greater sensitivity, particularly when analyzing extremely low concentrations.
Conclusion
Volumetric analysis remains one of the most elegant and dependable techniques in all of chemistry precisely because it turns a simple, careful measurement of liquid volume into an accurate calculation of chemical concentration. From titrating vinegar in a classroom to testing water hardness in an industrial plant, the same core principles apply every time: a known solution reacts predictably with an unknown one, a visible signal marks the reaction's completion, and simple stoichiometric math converts that observation into a precise number.
Mastering volumetric analysis means mastering careful technique, an understanding of the underlying chemistry, and the confidence to trust a well-executed experiment. Whether you are a student running your first titration or a professional relying on this method for quality control, the fundamentals covered in this guide give you everything you need to perform, understand, and troubleshoot volumetric analysis with confidence.
Volumetric Analysis: What It Is, How It Works, and Why It Still Matters
From the first crude burette assembled in 1795 to the precision glassware used in today's pharmaceutical labs, volumetric analysis has quietly shaped how we understand everything from the acidity of your drinking water to the purity of life-saving drugs. Here is everything — the history, the theory, the glassware, the calculations, and the techniques — explained clearly and honestly.
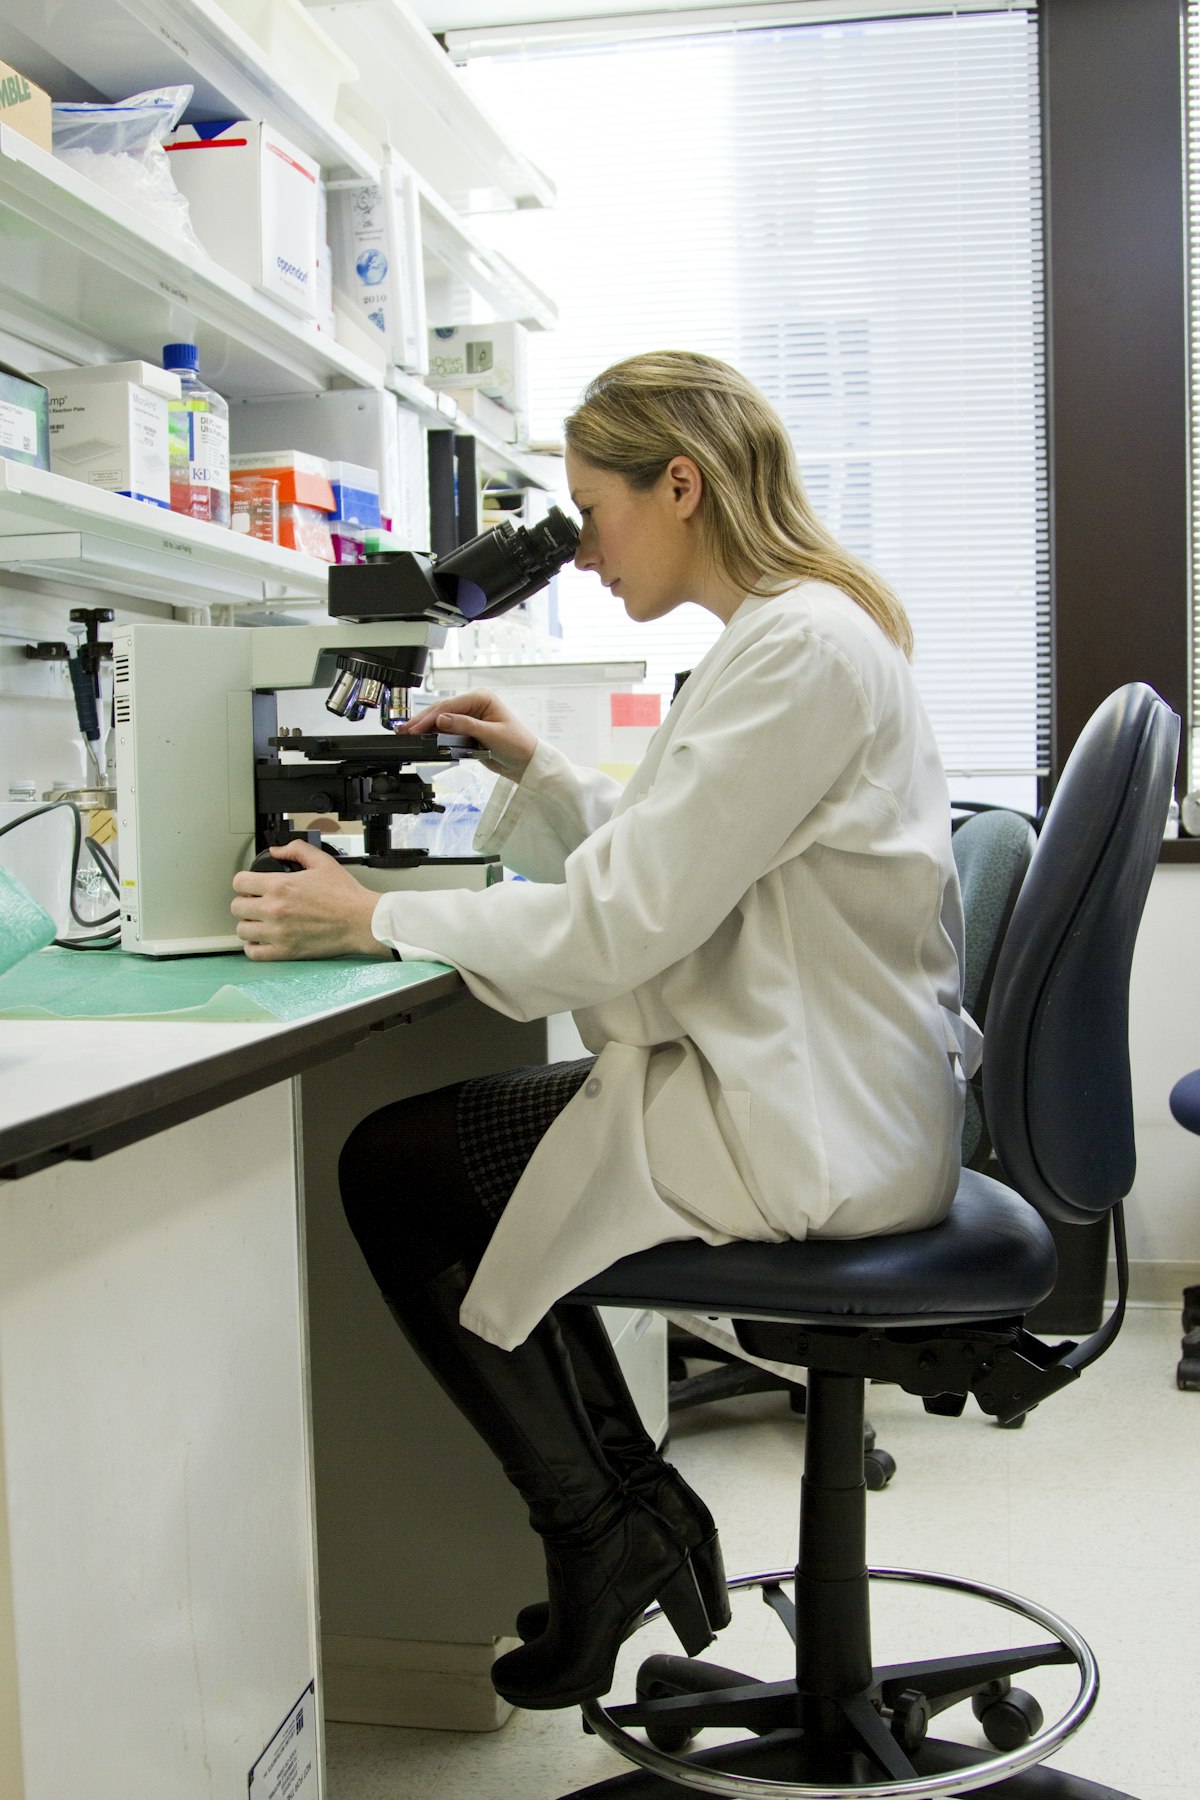
A titration in progress — one of the most fundamental techniques in analytical chemistry. Photo: Unsplash
What Is Volumetric Analysis?
At its core, volumetric analysis is a method of figuring out how much of a substance is in a solution — not by weighing it directly, but by measuring the volume of another solution that reacts with it completely. It sounds simple, and in practice it often is, which is a large part of why it has lasted as a standard analytical tool for over two centuries.
Volumetric analysis (also called titrimetric analysis) is a quantitative method in which the concentration of an unknown solution (the analyte) is determined by reacting it with a precisely measured volume of a solution of known concentration (the standard solution or titrant) until the chemical reaction between them is exactly complete.
The point at which the reaction is just complete is called the equivalence point or endpoint. Detecting it — usually through a colour change caused by an indicator or an electronic sensor — is the whole game. Once you know the volume of titrant used and its concentration, a little arithmetic gives you the concentration of the analyte.
You will encounter this technique in hospital labs (testing blood chemistry), environmental agencies (checking river water for pollutants), pharmaceutical factories (verifying drug potency), food companies (measuring acidity in drinks and oils), and secondary school classrooms the world over.
A Short History of Volumetric Analysis
Volumetric analysis did not arrive fully formed. It was pieced together over roughly a century by a chain of chemists each improving on what came before — which makes its history unusually satisfying to trace.
Original insight: It is worth noting that Gay-Lussac and Mohr — the two figures most responsible for establishing volumetric analysis — never met. Gay-Lussac did his key work in Paris while Mohr was still a student. Mohr discovered Gay-Lussac's methods through the literature and, recognising their potential, spent decades systematising and expanding them. Science often advances this way: not through single strokes of genius but through one person seeing the potential in another's work.
Key Terms You Need to Know
Before going further, it helps to have these terms clearly in mind. Confusion around them is the single biggest source of errors — both in exams and in actual labs.
| Term | What It Means | Example |
|---|---|---|
| Titrant | The solution of known concentration added from the burette | 0.1 M NaOH added to an HCl sample |
| Analyte (titrand) | The solution of unknown concentration being measured | The HCl sample in the conical flask |
| Standard solution | A solution whose concentration is precisely known | Freshly prepared 0.1000 M Na₂CO₃ |
| Equivalence point | The theoretical point where titrant and analyte have completely reacted | Exactly enough NaOH to neutralise all HCl |
| Endpoint | The observed point (usually a colour change) used to approximate the equivalence point | Phenolphthalein turns pink |
| Indicator | A substance that changes colour to signal the endpoint | Phenolphthalein, methyl orange, starch |
| Primary standard | A pure, stable compound used to prepare a standard solution directly by weighing | Anhydrous Na₂CO₃, oxalic acid, potassium dichromate |
| Titre | The volume of titrant used in a single titration run | 24.85 mL of NaOH |
The Four Main Types of Volumetric Titration
Volumetric analysis is not a single technique — it is a family of techniques, grouped by the type of chemical reaction that drives each one. Here is what separates them, when each one is used, and what makes each distinctive.
1. Acid-Base Titration
This is the type most people meet first, and for good reason: it is elegant in its simplicity. An acid reacts with a base to produce water and a salt. You add one from the burette until the other is completely neutralised. Indicators like phenolphthalein (colourless in acid, pink in base) or methyl orange (red in acid, yellow in base) signal the endpoint visually.
Real-world example: Water treatment plants use acid-base titration routinely to measure alkalinity — the water's capacity to neutralise acids. A technician pipettes a known volume of treated water into a flask, adds a few drops of indicator, then titrates with sulfuric acid until the colour change signals that all the alkalinity has been consumed. The result tells them whether the water meets safety parameters.
The neutralisation reaction in an acid-base titration:
HCl (aq) + NaOH (aq) → NaCl (aq) + H₂O (l)
One mole of HCl reacts with exactly one mole of NaOH. This 1:1 stoichiometry makes the arithmetic clean.
2. Redox (Oxidation-Reduction) Titration
In redox titrations, the reaction involves the transfer of electrons rather than protons. One reagent is oxidised while the other is reduced. These are particularly powerful for quantifying metal ions, dissolved oxygen, and organic compounds.
Common examples:
- Permanganimetry: using potassium permanganate (KMnO₄) as titrant. Its deep purple colour fades to a barely-there pink at the endpoint — no separate indicator needed. Used to determine iron(II) concentration and oxalic acid content.
- Iodometry: iodine is used as the oxidising agent, and starch is the indicator (turns deep blue-black in the presence of iodine, then goes colourless at the endpoint). Used in food science to determine vitamin C (ascorbic acid) content.
- Dichromate titration: potassium dichromate (K₂Cr₂O₇) is used to determine iron content in ores and steel. This is a primary standard — it can be weighed directly without prior standardisation.
3. Complexometric Titration
Here, the titrant reacts with metal ions in the analyte to form a stable, soluble complex. The workhorse of this category is EDTA (ethylenediaminetetraacetic acid), a molecule that wraps around metal ions like a molecular cage, forming 1:1 complexes with almost every metal ion in the periodic table.
Real-world application: Hardness in tap water is caused by dissolved calcium (Ca²⁺) and magnesium (Mg²⁺) ions. A water analyst pipettes a sample into a flask, adjusts the pH to around 10 using a buffer, adds a few drops of Eriochrome Black T indicator (which turns wine-red in the presence of metal ions), then titrates with standard EDTA. At the endpoint, the EDTA displaces the indicator from the metal ions and the solution turns blue. The titre gives the total hardness in mg/L of CaCO₃.
4. Precipitation Titration
In this type, the titrant reacts with the analyte to form an insoluble precipitate. The most widely used example is argentimetry — titrations involving silver nitrate (AgNO₃). The classic Mohr method uses AgNO₃ to determine chloride ions, with potassium chromate (K₂CrO₄) as the indicator. When all chloride has been precipitated as white AgCl, the excess Ag⁺ reacts with chromate to form a brick-red precipitate of Ag₂CrO₄, marking the endpoint.
Quick Comparison
| Type | Reaction Basis | Common Titrant | Typical Indicator | Key Use |
|---|---|---|---|---|
| Acid-Base | Proton transfer | NaOH, HCl, H₂SO₄ | Phenolphthalein, methyl orange | Purity of alkalis, acids; water alkalinity |
| Redox | Electron transfer | KMnO₄, K₂Cr₂O₇, Na₂S₂O₃ | Starch, self-indicating | Fe²⁺ content, vitamin C, dissolved oxygen |
| Complexometric | Complex formation | EDTA | Eriochrome Black T, murexide | Water hardness, metal ion concentration |
| Precipitation | Precipitate formation | AgNO₃ | K₂CrO₄ (Mohr), Fluorescein (Fajans) | Chloride in water, food, blood serum |
Volumetric Glassware — Knowing Your Tools
The accuracy of a volumetric analysis lives and dies with the quality of the glassware and the care taken in using it. There are three primary pieces of equipment.
The Burette
A burette is a long, graduated glass tube — usually 50 mL capacity — with a precision stopcock at the bottom. You fill it with titrant, read the initial volume, run the titration, then read the final volume. The titre is the difference. A Class A 50 mL burette has a tolerance of ±0.02 mL, which in a typical experiment involving ~25 mL volumes translates to a relative error of around 0.08% — impressive for inexpensive glassware.
One thing students often miss: a burette is read from the bottom of the meniscus, and the scale runs top-to-bottom (0 mL at the top, 50 mL at the bottom). Always place a white card behind the burette when reading to improve contrast.
The Volumetric Pipette
A volumetric pipette (or bulb pipette) is designed to deliver one fixed, precisely measured volume — typically 10, 20, or 25 mL. It has a large central bulb and a long capillary neck with a single graduation mark. When calibrated to deliver (marked "Ex"), you allow the last drop to drain naturally — do not blow out the residue, as the calibration accounts for the small amount that remains.
Volumetric pipettes are more accurate than graduated (Mohr) pipettes because they have only a single graduation mark, eliminating the accumulation of reading errors. Use them for the analyte, not for rough measurements.
The Volumetric Flask
A volumetric flask has a flat bottom, a wide body, and a long narrow neck with a single graduation mark. Its sole job is to hold or prepare an exact volume of solution. Class A flasks have tolerances as tight as ±0.03 mL for a 100 mL flask.
When making a standard solution: dissolve your solid reagent in a little solvent first, transfer to the flask, then add solvent carefully until the bottom of the meniscus just touches the graduation mark. Invert several times to mix. Never heat a volumetric flask — the glass expands and the volume marking becomes inaccurate.
| Glassware | Function | Class A Accuracy (50/100 mL) | Standard |
|---|---|---|---|
| Burette (50 mL) | Dispenses variable volumes of titrant | ±0.02 mL | ISO 385 / ASTM E287 |
| Volumetric Pipette (25 mL) | Delivers one fixed volume of analyte | ±0.03 mL | ISO 648 |
| Volumetric Flask (100 mL) | Prepares solutions of exact volume | ±0.10 mL | ISO 1042 / ASTM E288 |
Note on glass vs plastic: Standard volumetric glassware is made from borosilicate glass (BORO 3.3), which has a very low coefficient of thermal expansion. A 1 L glass flask that holds exactly 1.00000 L at 15°C holds only 1.00025 L at 25°C — a negligible difference. This is why glassware is calibrated at 20°C and kept away from heat sources during use.
How to Perform a Titration — Step by Step
The following is a practical walk-through for a standard acid-base titration. The same sequence — with appropriate modifications for reaction type and indicator — applies to all four categories described above.

The final addition of titrant near the endpoint demands a slow, controlled technique. Photo: Unsplash
Accurately weigh your primary standard (e.g., anhydrous Na₂CO₃) on an analytical balance. Transfer to a clean beaker, dissolve in a small volume of distilled water, then transfer quantitatively to a volumetric flask. Make up to the mark with distilled water and invert to mix. Label with concentration, date, and your name.
Wash the burette with distilled water, then rinse two or three times with small volumes of the titrant (not distilled water). This prevents dilution of the titrant. Fill the burette above the 0 mL mark, open the stopcock to flush the tip, then lower to exactly 0.00 mL. Check for air bubbles.
Rinse the volumetric pipette with distilled water, then two or three times with small volumes of the analyte solution. Pipette the required volume (e.g., 25.00 mL) of analyte into a clean conical flask. A clean conical flask does not need to be dry — any residual water does not affect the amount of analyte present.
Add 2–3 drops of your chosen indicator. Run a preliminary ("rough") titration quickly to find the approximate endpoint. This rough reading is not included in calculations but guides you for the accurate runs.
Refill the burette to 0.00 mL. Add titrant steadily, swirling the flask continuously. As you approach the rough endpoint, slow down to half-drop additions. The endpoint is reached when a single half-drop causes a permanent colour change that lasts at least 30 seconds. Record the titre. Repeat until at least three concordant readings (within 0.10 mL of each other) are obtained.
Use the average of your concordant titres. Apply the relevant formula (see below) to calculate the concentration of the analyte. Check your units and significant figures.
Calculations in Volumetric Analysis
The mathematics of volumetric analysis is not complicated — it relies on a handful of relationships that you apply consistently. The key is understanding why the formulas work, not just memorising them.
C₁V₁ / n₁ = C₂V₂ / n₂
Where: C = concentration, V = volume, n = molar ratio from the balanced equation
Scenario: 25.00 mL of hydrochloric acid (HCl) of unknown concentration is titrated with 0.1000 M sodium hydroxide (NaOH). The average titre from three concordant readings is 23.40 mL. What is the concentration of the HCl?
Step 1 — Write the balanced equation
Molar ratio: 1 : 1
Step 2 — Calculate moles of NaOH used
n(NaOH) = 0.002340 mol
Step 3 — Apply the molar ratio
n(HCl) = n(NaOH) = 0.002340 mol
Step 4 — Calculate concentration of HCl
C(HCl) = 0.09360 mol/L ≈ 0.0936 M
Scenario: A 20.00 mL sample of iron(II) sulfate solution is titrated with 0.0200 M KMnO₄ in acidic solution. The average titre is 18.50 mL. Find the concentration of Fe²⁺.
Balanced half-reactions and overall equation
Fe²⁺ → Fe³⁺ + e⁻
Overall: MnO₄⁻ + 5Fe²⁺ + 8H⁺ → Mn²⁺ + 5Fe³⁺ + 4H₂O
Molar ratio KMnO₄ : Fe²⁺ = 1 : 5
Calculation
n(Fe²⁺) = 5 × 3.70 × 10⁻⁴ = 1.85 × 10⁻³ mol
C(Fe²⁺) = 1.85 × 10⁻³ / 0.02000 = 0.0925 mol/L
Note the 1:5 molar ratio — this is where students most often lose marks. The balanced equation is not optional; it is the core of the calculation.
Back Titration
Sometimes direct titration is not possible — the analyte may react too slowly, the endpoint may be unclear, or the analyte may not dissolve easily. In these cases, a back titration is used.
The approach: add an excess of a known reagent to the analyte, let the reaction go to completion, then titrate the unreacted excess with a second standard solution. The amount of analyte is found by subtraction.
Scenario: A 0.500 g sample of impure chalk (CaCO₃) is dissolved in 50.00 mL of 1.000 M HCl. The excess acid requires 12.50 mL of 1.000 M NaOH to neutralise it. What is the percentage purity of the chalk?
n(NaOH) used = 1.000 × 0.01250 = 0.01250 mol
n(HCl) that reacted with CaCO₃ = 0.05000 − 0.01250 = 0.03750 mol
CaCO₃ + 2HCl → CaCl₂ + H₂O + CO₂
Ratio 1:2, so n(CaCO₃) = 0.03750 / 2 = 0.01875 mol
Mass of CaCO₃ = 0.01875 × 100.09 = 1.877 g
% purity = (1.877 / 0.500) × 100 = 375%
⚠️ The result above is impossible (>100%) — this signals a data error in the question, demonstrating why it is always worth sanity-checking your answer. In a real exam, the numbers would be set so the answer falls between 0% and 100%.
Pre-Titration Lab Checklist
Before you begin any volumetric analysis, run through this checklist to avoid the most common errors:
- Burette is clean, rinsed with titrant, filled to 0.00 mL, and free of air bubbles
- Pipette is clean and rinsed with analyte solution (not distilled water)
- Volumetric flask is clean — rinsing with analyte is unnecessary for the flask holding the standard solution
- Indicator is added in the minimum effective amount (2–3 drops max)
- All solutions are at room temperature (~20°C)
- A white tile is placed under the conical flask for clear endpoint observation
- The rough titration has been completed and the approximate endpoint is known
- At least three accurate titres are planned
- Concordance criterion is defined (typically titres within 0.10 mL)
- Blank titration performed if reagent impurity is a concern
Pros and Limitations of Volumetric Analysis
Advantages
- High accuracy and precision with proper technique
- Relatively inexpensive equipment
- Fast — a single titration takes minutes
- Applicable to a huge range of analytes
- No need for expensive instrumentation
- Transparent methodology — easy to verify and repeat
- Well-established international standards (ISO, ASTM)
Limitations
- Requires the reaction to be fast, complete, and specific
- Endpoint detection can be subjective (colour vision matters)
- Indicator errors — endpoint ≠ equivalence point exactly
- Not suitable for very dilute solutions (<10⁻⁴ M)
- Manual technique — reproducibility depends on skill
- Coloured or turbid samples complicate visual endpoints
- Limited to dissolved species — solid samples need dissolution
Where Volumetric Analysis Is Used in the Real World
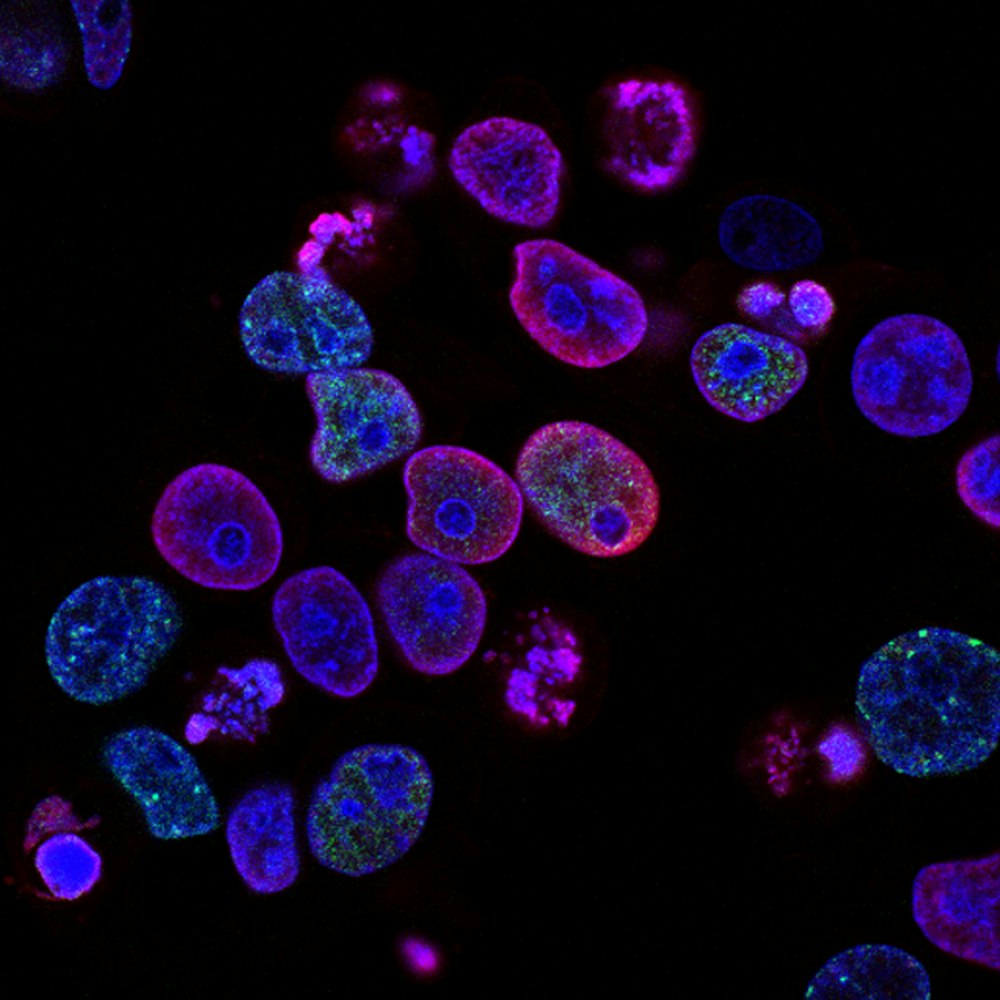
Drug purity testing in pharmaceutical labs relies heavily on volumetric methods. Photo: Unsplash
Pharmaceuticals
Drug manufacturers use acid-base and complexometric titrations to verify the potency of active pharmaceutical ingredients (APIs). A paracetamol tablet labelled 500 mg must actually contain 500 mg — not 480 mg, not 520 mg. Volumetric analysis provides the quick, reliable answer. Many pharmacopoeias (including the British and US Pharmacopoeia) mandate titration as the reference method for drug standardisation.
Water Treatment
Total hardness (complexometric), alkalinity (acid-base), residual chlorine (iodometric), and dissolved oxygen (Winkler method — a redox titration) are all routinely measured by volumetric methods. They are fast enough for the continuous monitoring that water safety demands.
Food Science
Acidity in wine, vinegar, and edible oils is measured by acid-base titration. Vitamin C content in juices is measured by iodometric titration. Salt concentration (chloride) in processed foods is determined by argentimetric titration. These analyses inform both food labelling and quality control.
Environmental Analysis
Chemical oxygen demand (COD) — a key indicator of water pollution — is measured by a redox back titration using potassium dichromate. River water samples are digested with excess dichromate, then the unreacted dichromate is titrated with ferrous ammonium sulfate (FAS). The result tells regulators how much organic pollution is present.
Mining and Metallurgy
The iron content of ore is a direct input into the economics of steel production. Redox titrations with permanganate or dichromate provide fast, accurate iron determinations that labs run hundreds of times daily.
Frequently Asked Questions
There Is More Where This Came From
Labari covers science, nature, and how the world works — written clearly, without the fluff. If this piece on volumetric analysis was useful to you, you will find the same depth and honesty across every topic on the site.
Explore labari.com.ng for more topics on science
Post a Comment